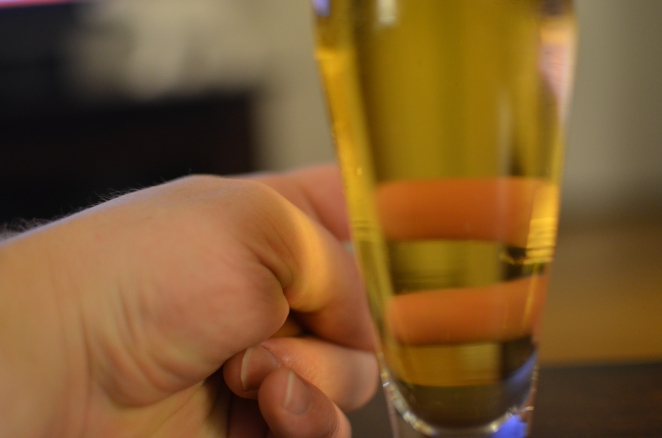
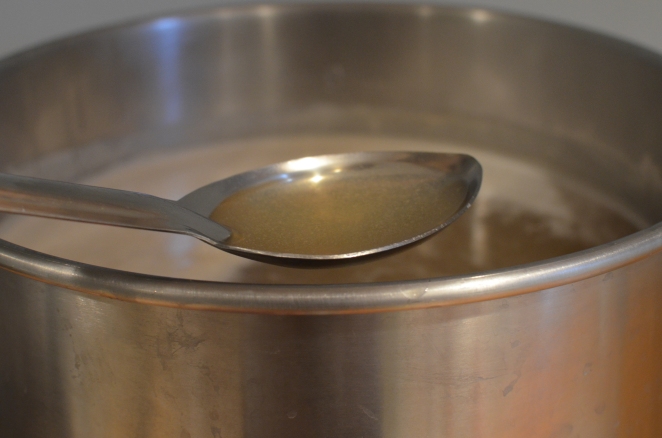
This may have been my first time re-brewing a recipe without any changes. I last brewed this beer in September and it turned out pretty fantastic. Very clean, low grainy malt flavour, and just a hint of spicy hop in the flavour. The 2.0 was brewed back in September and submitted into a homebrew advent calendar, the 2.1 was re-brewed on Nov 16ᵗʰ for the wedding. The name is inspired by my dog Newton, who is always off somewhere getting into trouble! The below picture is of the 2.0, it is slightly blurry but you can see the perfect clarity and beautiful pale gold colour.
Going back a step, Helles is kind of an obscure style for some people in North American. According to the German Beer Institute it accounts for one out of every four beers consumed in Germany, only less popular than the German Pilsner and Weizen styles. The name Helles comes from the German word “hell” which means light. This style is one of the few with a definite birthday, first released by Spaten Brewery on March 21ˢᵗ 1894. It is the main beer style served in the beer tents at the Munich Oktoberfest, and is typified by beers like Hofbrau Original, Spaten Premium Lager, Hacker-Pschorr Münchner Gold, and many more. Those listed beers are available in the LCBO in Ontario, and it was the Hofbrau Original that inspired me to try my hand at brewing a lager (because it was delicious)!
My thinking behind this recipe was to keep it pretty simple and only add things with a purpose. My original recipe had Munich I and Melanoiden in addition to the Pilsner so this version is simpler. The traditional Helles recipe is just 100% Pilsner malt with just enough hop bitterness to balance. I decided to add a tiny bit of interest in form of Vienna malt and a touch of Saaz as a late boil addition. I’ve found that sufficient lagering time is very important for lager styles since high clarity increases their appeal. Check out how clear the 2.0 turned out!
Helles 2.1
Description
Brewed: Nov 16, 2014
Kegged: Dec 10, 2014
OG: 1.048
FG: 1.010 (actual 1.006)
Target ABV: 5.0% (actual 5.5%)
18 IBU
3.5 SRM
Process
Batch Size: 6 gallons
Mash: 150°F for 60 mins @ 1.50 qt/lb thickness
Boil: 90 minutes
Pre-boil Volume: 7.75 gallons pre-boil
Brewhouse Efficiency: 75%
Grain Bill
8.5 lbs Pilsner 1.8L (Weyermann)
1 lbs Vienna 3.5L (Weyermann)
Boil Additions
0.70 oz Hallertau Tradition 6.5% AA @ 60 mins (16.1 IBU)
0.25 oz Saaz 4.0% AA @ 15 mins (1.8 IBU)
1 whirlfloc, 2 g DAP yeast nutrient @ 10 mins
Water and pH
Mash pH target: 5.32 pH (Bru’n Water)
Water Volumes: mash 3.69 gallons, sparge 5.31 gallons
Gypsum: 0.7 g in mash, 1.1 g in sparge
Calcium Chloride: 0.4 g in mash, 0.5 g in sparge
Lactic Acid: 3.7 mL in mash, 2.2 mL in sparge
Water Profile: Ca = 54.2 ppm, Mg = 9 ppm, Na = 15 ppm, SO4 = 56.9 ppm, Cl = 39.1 ppm, HCO3 = -76.1 ppm, RA = -107ppm, SO4:Cl = 1.5
Fermentation
WLP833 (~387 Billion cells)
Pitch at 46°F
Controller set to 50°F
Bump up 5°F per day starting on Day 6
Two days before the brew day I took my slurry of WLP833 out of the fridge and made a 3 L starter to build up enough cells for the lager pitching rate of 1.50 million cells / mL / degree Plato, plus enough to harvest for the next batch using that yeast. I use the Brulosophy method of yeast harvesting where you harvest from your overbuilt starter instead of from the fermenter. This allows cleaner yeast, free of any hop trub and excessive protein trub. My way is slightly different than Brulosophy’s, because I measure the volume of sediment at the bottom of the mason jar and calculate/estimate the number of cells form that. In this case I had 25 mL of sediment, which worked out to 60 Billion cells when I assumed 2.5 Billion cells / mL. I’m probably under estimating the number of cells, but hopefully I can get some data on sediment density at some point. This step allowed me to grow an estimated 491 Billion cells, ~100 Billion larger than needed.
The brew day went off about as well usual, a few minor misses that I was able to compensate for. I heated the 3.69 gallons of water and transferred it into the mash tun. Once it was a few degrees over my desired strike temp I tossed in my salts and acid. I mashed in at 161.5°F and settled at 149°F, close enough to my desired temp of 150°F. I measured my initial pH at 5.54 pH so I tossed in 1.8 mL of lactic acid to hit 5.33 pH in the mash. After the pH measurement the temp had dropped to 147°F so I added 1 qt of boiling water to bring it back up around 150°F. After the 60 minute mash rest was done I vorlaufed and then ran out the first running into my sparge bucket.
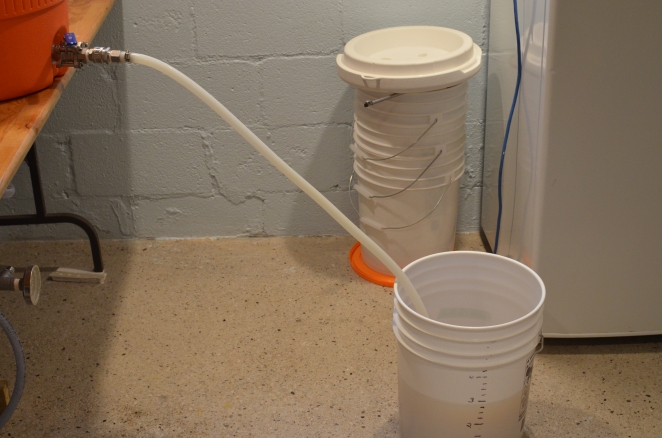
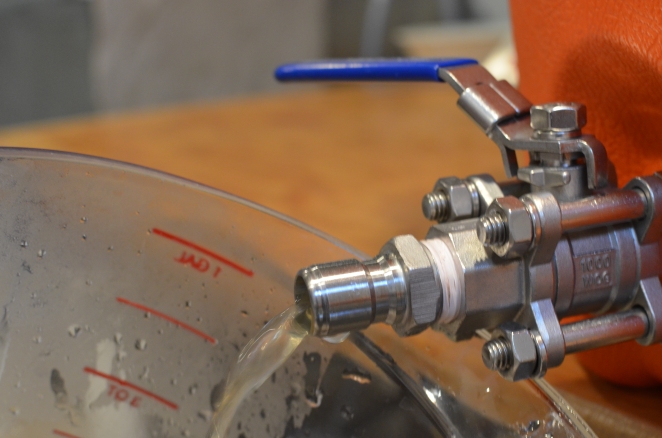
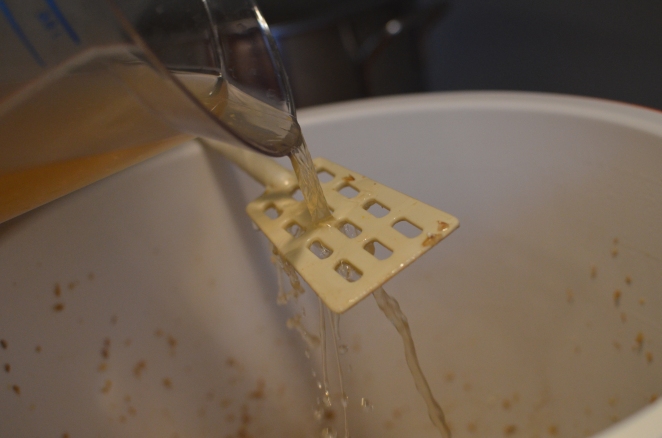
I thought I would take a few words in this post and explain my batch sparging process, it has worked pretty well so far and has allowed me to brew with only 2 vessels (kettle + cooler), plus a bucket. I have a rubbermaid graduated pitcher that I use for a myriad of things the brewery. I use my mash paddle to disperse the wort as I pour it back in over the top of the grain bed. Then I have a food grade bucket that I have graduated at various intervals that I sparge into. This way I can have sparge water heating in my pot while I am draining wort out of the mash tun. I use the bucket as an intermediate holding vessel while I pump the sparge water into the cooler for the batch sparge. I pump my sparge water in from under the false bottom which allows me to re-suspend the grain bed easier, and mix in the sparge acid and salts at the same time. While the grain bed is resettling I take that time to transfer my first runnings into the now empty kettle using the pitcher, then get them heating. Then I vorlauf again, run the second runnings into the bucket, and transfer in with the pitcher. It’s a fairly straight forward process but I thought I would explain it anyway, plus I think the under-letting of the sparge water is somewhat unique. Someone posted about doing that a few weeks ago on reddit and people were surprised.
I collected 2.6 gallons of 1.073 SG wort in the first runnings, then 5.31 of sparge water gave 5.3 gallons of 1.020 SG wort. This all mixed together in the kettle to give me 7.8 gallons of 1.038 SG for pre-boil. Look at that colour!
The 90 minute boil was fairly uneventful but when I took a reading at the end of the boil I had 6.25 gallons (hot) of 1.052 SG, so I added 1 qt of water to bring it down and hit my 1.048 OG. Unfortunately my ground water hadn’t dropped to winter temperatures at the time I brewed this so I chilled to 58°F and threw it in my fermentation chamber for 2 hours before pitching at 45°F. Then I set the controller to 50°F and let it go for 5 days before I started raising the temp, eventually hitting 65°F on day 8. I took it out of the fermentation chamber and let it sit at room temp for another 2 weeks to let it clean up, and wait for a keg to become free. I finally measured the FG on Dec 10th at 1.006, quite a bit lower than the 1.010 I was hoping for. I guess that 147°F-149°F mash temp made it a bit more fermentable than I expected. So much for trying to hit 5.0% ABV on the dot! I racked it into a keg and threw it into the keezer to lager next to my doppelbock (post coming) until sometime in January when I’ll start carbing it up, I don’t have any CO2 lines free right now.
I tasted the hydrometer sample before racking and it was clean, free of any diacetyl, and fortunately didn’t feel too thin on the tongue. Similar to the first batch, grainy Pilsner malt was the main flavour with a low level of spicy hop flavour. Very clean, no esters. Excited to see how it tastes once carbonated and lagered.
Here’s a bonus picture of my corgi Newton!

![DSC_2341[1]](https://ericbrews.com/wp-content/uploads/2014/12/dsc_23411.jpg?w=662&h=438)
That beer looks and sounds delicious! The colour, the flavour… Helles is certainly one of my favourite styles.
LikeLike
Thanks brulosopher! Next lager in planning is a dry hopped german pilsner. I’m a Pivo/Prima convert.
LikeLiked by 1 person
So when you measure your mash pH are you taking the reading with a room temp sample? I forget where I read it specifically, but was under the impression that 5.2 pH at mash temps (150Fish) you’d have a 5.4-ish pH sample at room temp.
Also, having tried the 2.0 version, I can’t wait to sample the 2.1. You got me onto the Lager train now Eric,
LikeLike
I have a bowl of ice and chill the sample down quickly to room temp. I’ll be sure to elaborate on this in the next post! Thanks for reading!
LikeLike
Oh man, I loves me some Helles! It’s my favorite beer to show beer snobs that a light lager can be something crave-worth. When I was in Munich I probably drank a gallon a day 🙂
I’m a fan of keeping a pretty simple pils base, but I also like to add a bit of melanoidin just to add a little something extra. Looks great!
LikeLike
Thanks for reading!
LikeLiked by 1 person
I use the exact same 1 kettle / 1 mash tun method. It has probably done more to slow down my second keggle construction than my laziness alone. That’s saying something!
I have a Helles in the lagering stage now too. Thanks for the Blog!
LikeLike
I love the simplicity in the 2 vessel. The only lifting required is the bucket, instead of a kettle with 8 gallons of wort in it! Thanks for reading!
LikeLike
I am on a well so I don’t use it for brewing. I use 75% Distilled and 25% city of Peterborough water and my Helles has turned out quite nice. I am surprised of the Pils malt taste I never got with ale yeast. I used 92% Pils malt and 8% Munich 1. I may drop the Munich 1 to see what the difference will be. I also used WLP833 and think it is a great yeast. My lag time when I pitch @ 44 F to 46 F is 68 hours. Can’t figure that out as I use a big starter – 1.75 million cells/degree plato. Thanks for the blog Eric and the work you do with the SOB.
LikeLike
Turned out crystal clear! Nice work.
LikeLike
Hey Eric – thanks for the great write up. I am fermenting this recipe as my first lager. Quick question – you ramped up the temp to 65 degrees over 3 days then let the fermenter stand at room temp for 2 weeks. I have read that after a couple of days for a diacetyl rest that you’re supposed to bring the beer back down to cooler temps to finish off fermenting, then lager it. Any reason I would want to keep it at room temp instead of dropping it back down to a cooler temp (say 65 degrees)? Just trying to get the cleanest taste I can out of it. Cheers!
LikeLike
I waited 2 weeks out of a combo laziness and waiting for it to finish. Don’t ramp anything down until you taste it and make sure that all the diacetyl and acetaldehyde are cleaned up, and that FG is reached. Those won’t be cleaned up at the lower lager temps. Sulphur will though, given enough time.
Never follow anyone else’s fermentation timeline strictly. Always go with what the beer dictates. If it isn’t finished attenuating to FG and cleaning up, then it isn’t done fermenting.
LikeLike
Thanks Eric – I have ramped up the temp to room temp for 5 days now. I have hit my FG and the sample tastes clean. I have a conical fermenter so I thought I would flush out the settled yeast cake at this time then start my lagering process. Or should I let it sit a bit longer at room temp? (I was quite excited at how good it tasted already). Cheers.
LikeLike
Loving the clarity on that beer!
LikeLike