I recently brewed a coffee blonde ale and it was quite the hit with my homebrew club and friends so I decided to share the recipe in the form of a blog post. The coffee was only added to half of the batch so I only netted about 2.5 gallons. The 1/2 keg kicked in under a week, so it must be good.
One of the most memorable beers I tried on my honeymoon in Denver was a pale coffee beer by Former Future. They took their regular Countinghouse Cream Ale and infused coffee (I think through cold brewed coffee). As you can see in this picture the middle beer had a gold colour, but with fantastic coffee aromatics. I had also previously read a blog post by The Mad Fermentationist on his coffee blonde. With these two sources of inspiration I set off on my quest to craft a pale coffee beer.
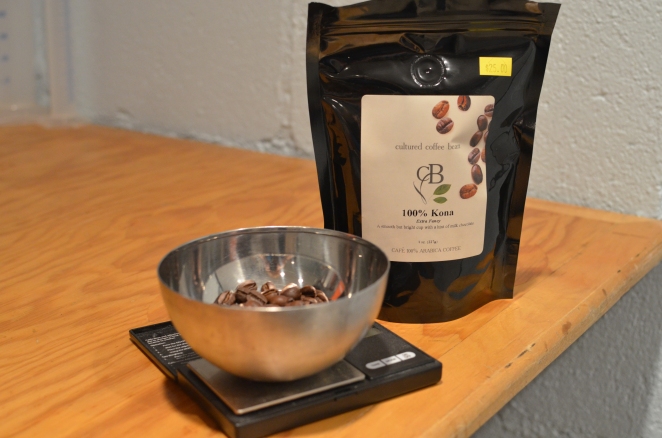
In my opinion all specialty beers are about striking the right balance between the base beer and the specialty ingredient. For this beer I wanted something visually deceiving that surprised the drinker with unexpected coffee flavour and aroma. I took inspiration from TMF and decided to “dry bean” the beer in the fermenter after primary was finished. I was hoping this would lend minimal colour from the beans but still extract a reasonable amount of flavour and aroma. I wasn’t sure at first which variety of coffee to pick. My friend Craig had been having great success with Kona Fancy from Cultured Coffee Bean in his stouts so I decided to go with that since I liked the quality of the coffee aroma he had been getting in his beers. I decided that the base beer should be a blonde for two reasons. I wanted a very pale base beer that I could still ferment as an ale, and also because I haven’t been very successful in the past in my two attempts at brewing blonde ale. Both times my blonde ales I have had a strange flavour I haven’t been able to place. Some people have said DMS, but it doesn’t resonate like that to me.
In an effort to clean up the base beer I decided to extend the boil out to 90 minutes (even though the base malt was 2 row), and to increase the pitching rate to hybrid level (1 million cells per mL per °P). I took some queues from TMF and added oats to my grain bill for body, some vienna was also added for the bready malt character. My usual WLP090 clean ale yeast was used, and hops only for bittering in the form on magnum. I went with a neutral water profile, Calcium just over 50 ppm, and a Sulfate to Chloride ratio of 1.3.
Kona Coffee Blonde Ale
Description
Brewed: Mar 26, 2015
Kegged: Apr 9, 2015
Targets: OG: 1.047, FG: 1.009, ABV: 5.0%
Actual: OG: 1.047, FG: 1.007, ABV: 5.3%
21 IBU
3.4 SRM
Process
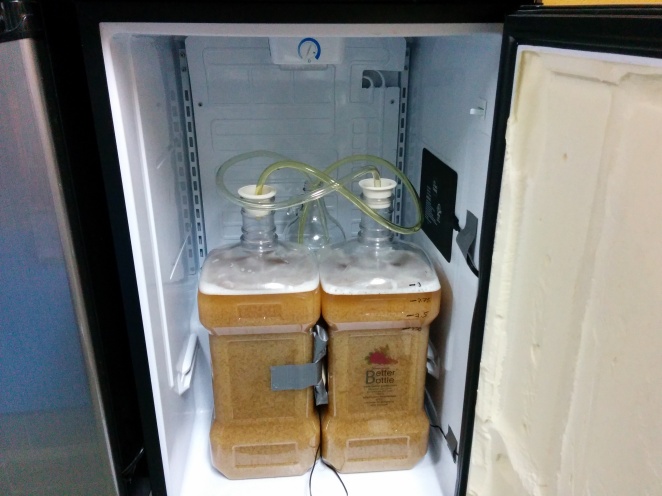
Batch Size: 6 gallons (split into two 3 gallon Better Bottles)
Mash: 152°F for 60 mins @ 1.50 qt/lb thickness
Boil: 90 minutes
Pre-boil Volume: 7.75 gallons pre-boil
Brewhouse Efficiency: 75%
Grain Bill
7 lbs 2 Row 2L (OiO) [73.7%]
2 lbs Vienna 3.5L (Weyermann) [21.1%]
8 oz Flaked Oats 1L (OiO) [5.3%]
Boil Additions
0.5 oz US Magnum 12.2% AA @ 60 mins (21 IBU)
1 whirlfloc, 2 g DAP yeast nutrient @ 10 mins
Water and pH
Mash pH target: 5.21 pH (Bru’n Water)
Water Volumes: mash 3.69 gallons, sparge 5.32 gallons (1.50 qts/lbs mash)
Gypsum: 0.7 g in mash, 1.1 g in sparge
Calcium Chloride: 0.4 g in mash, 0.5 g in sparge
Lactic Acid: 4.5 mL in mash, 2.2 mL in sparge
Water Profile: Ca = 56.5 ppm, Mg = 9 ppm, Na = 15 ppm, SO4 = 56.9 ppm, Cl = 43.2 ppm, HCO3 = -112.6 ppm, RA = -138 ppm, SO4:Cl =1.3
Fermentation
WLP090 (~124 Billion cells per 3 gallon better bottle)
Pitch at 60°F
Aerate with 30 seconds of O2 (per 3 gallon better bottle)
Controller set to 64°F
Bump up to 72°F on Day 4
Specialty Addition
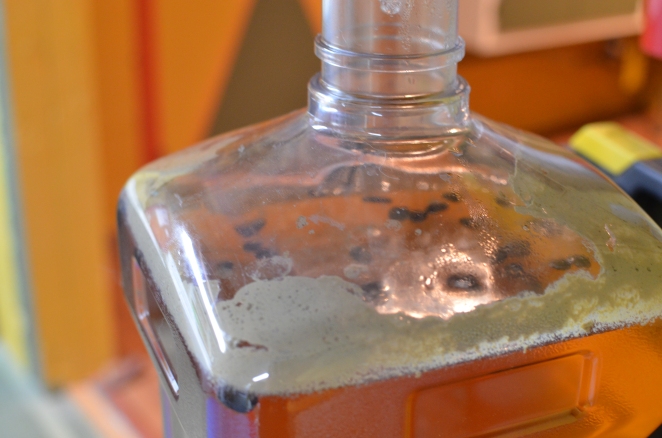
Add 1 oz of whole Kona coffee beans to 3 gallons for 24 hours before kegging
This was a fairly standard brew day, no major deviations from my standard process. All the water and acid volumes, salt weights, and boil additions were used as described in the recipe. I mashed in with my strike water at 164.8°F and hit my 152°F target on the nose. My measured pH was 5.55 pH so I added an additional 2.2 mL of lactic acid to bring the pH down to 5.36 pH. I combined my first and second wort runnings in the kettle for a pre boil of 7.75 gal @1.040 SG. After the 90 minute boil my gravity was a touch higher than desired at 1.050 so I added 1.5 qt of tap water to bring the OG down to 1.047. I ran 2.75 gallons of wort into each 3 gallon Better Bottle and pitched an estimated 124 billion cells of WLP090 in each for approximately 1.0 billion/mL/°P (hybrid rate). The carboys were held at 64°F for 4 days before I bumped them up to 72°F to finish off for another week or so. On April 8th I took a FG reading for each carboy and they were identical at 1.007, a bit lower than the target 1.009 but still delicious. I measured out 1 oz of whole Kona coffee beans and tossed it into the carboy to sit for 24 hrs. The next evening I took a sample using a thief and was pleasantly surprised at the balance of coffee and malt in the beer. The coffee aroma and flavour were undeniably present (and delicious) but you could still taste the light bready flavour of the base beer, perfect balance for a specialty beer. I racked both Better Bottles into 2.5 gallon kegs and set them to carb up over a week or so.
Tasting
In an effort to improve the perception my readers can get of my beers I have added a more structured tasting section in my recipe posts. I will follow the standard five step model, however I will try to stick to standard beer vocabulary and structured qualitative+quantitative descriptors like I would when judging a BJCP competition. I find it hard to visualize a beer when vague terms like “nice”, “good” are used or subjective terms.
Aroma: Medium level coffee aroma with some chocolate hints. Low level bready malt aromas. No esters or hops. Clean ferment character, no diacetyl or acetaldehyde. No DMS. Definitely coffee forward but not enough to hide the base beer malt aromas completely.
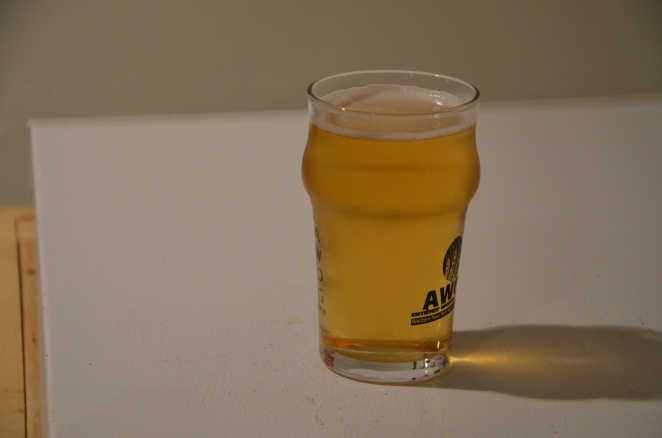
Appearance: Yellow coloured beer with medium-high clarity. Medium head retention of white, medium density foam.
Flavour: Medium level coffee flavour with notes of chocolate. Low level of bready malt. Dry finish with low lingering coffee flavour. Even balance, not sweet or bitter. Low bitterness. No hops. Clean ferment, no esters.
Mouthfeel: Medium-low body with medium carbonation. Low creaminess. No astringency or warming.
Overall: A well balanced specialty beer with high drinkability. The beer could support a bit more coffee flavour, and a touch more sweetness in the finish.
I am very happy with how this beer turned out and I recently re-brewed to serve at an event at the end of May. I have decided to up the coffee addition to 2.5 oz, which is only 1/4 oz more per 2.5 gallons than I did in this batch. The reason for that is that the coffee started to fade after a few weeks and I want to play with the intensity to adjust for this.


I wonder if you’d get more coffee character if you coarsely ground the beans. Something to test in 2.0!
LikeLike
I almost certainly would get more character, but I think as soon as I ground the beans I would start to get colour from the beans (which I’m trying to avoid). Instead I opted just to use more. 🙂
LikeLiked by 2 people
This sounds delicious, I’m adding it to my brew queue! Thanks for the detailed recipe and brew notes.
LikeLike
Cheers! Thanks for reading!
LikeLike
Did you take any steps to remove oil from your coffee beans for the sake of protecting head retention? Maybe that’s a silly concern when we’re only talking about a few ounces of beans.
LikeLike
I didn’t. I didn’t even bother sanitizing them.
LikeLike
What temp was the beer when you added the beans? Did you cold crash after the 24 hours? If so, did you remove the beans before crashing ?
LikeLike
I just added the bean after D rest (around 72F) and kept it at that temp for 24 hours. Then I racked into the keg warm.
I’ve been skipping cold crash lately since my beers have been sitting long enough to fall clear even warm. Even my hoppy beers have been dropping clear when warm within 2 weeks. I used to cold crash every beer though.
LikeLike
Good write up. Like the way you thoroughly covered the process. This is something I will try – and as a split batch as you did. I wish to experiment with lactose, oats etc and lean in the direction of Regular Coffee by Carton Brewing Co (http://allaboutbeer.com/article/coffee-beers/). I will be using you write up as a reference. Danke.
LikeLike
Cheers Malcolm!
LikeLike
Just tapped this. Pretty damn good! I used Kenyan coffee instead of Kona. Made sure is was freshly roasted. Awesome aroma and really prominent coffee taste. Love the impact of the flaked oats in this recipe.
Thanks for the write-up! A very interesting beer. Light but rich. Full of flavor. And love the simple dry bean technique. Seems to extract plenty of coffee flavor, and no astringency, without any complicated process. I will not hesitate to do this with stouts and porters in the future. So easy!
LikeLiked by 1 person
Has anyone used any other style of bean other than 100% Kona? In an effort to replicate, but not add 25$ to the batch cost. Just wondering if a good sumatra from trader joes might suffice?
LikeLike
A commenter above said they used fresh roasted kenyan coffee. That sounded good.
LikeLike
Hi eric ! Im a professional brewer from Brazil and im trying the same with coffees here, thanks for the tips and sorry about my bad english! What is easy for us here is the good coffee is cheap and easy to find.
LikeLike
Cheers!
What kinds of coffee have you tried this with?
LikeLike
How much cocoa nibs and for how long to make this like a schafly double been blonde?
LikeLike
Hi Chris. This beer was only coffee, no nibs. Sorry, I haven’t had schlafly double bean blonde.
LikeLike
I think I’m gonna brew something like this this soon. I’m curious what you were shooting for in terms of carbonation. Did/would you stick to carbonation typical for a blonde, or go higher or lower to compliment the coffee flavor?
LikeLike
Fairly sure I did regular 2.5 ish vols of CO2.
LikeLike
I carbonated mine like you would a blonde. Although this beer would obviously be great on nitro. I don’t think is go with lower carbonation with just straight co2, though.
LikeLike
Also from Brazil and really looking forward on trying this recipe.
Thanks for the detailed information. And, as mentioned before, it’s quite easy to access good coffee here, I’m planning on using a really good coffee from a farmers market near my place.
LikeLike
Hi Eric
Thank you for a very interesting post
This will surely be one of my next brews
LikeLike
Have you considered transferring the beer to secondary between the 64F fermentation and the 72F finish?
LikeLike
Hi Jeff. I don’t really transfer to secondary for anything except sour beers, where they will sit around for more than year.
A quick beer like this would only suffer (from oxygen uptake) by transferring.
LikeLike
can you please confirm the coffee addition? In the article, I think you said 1oz for 3g, but then in the tasting notes I think you say 2.5oz for 2.5g? I just want to make sure I don’t under or over do it.
LikeLike
Hi Aaron,
I did:
1oz for 3 gal batch
2.5 oz for 5.5 gal batch
Hopefully that clears it up?
Cheers,
Eric
LikeLike
It does – thanks. I might try a 3g batch with 1.25oz beans and see how it goes.
LikeLike
I just brewed this with a few tweaks as I always do…I am making it a chocolate Blonde , rather than a coffee blonde. Soaking some toasted nibs in the fermenter at the end for 36hrs, may add a bit of chocolate extract in the keg for taste if I feel the need. I’ll try to follow up with a taster description when finished.
LikeLike
Love it! Any color pick up?
LikeLike