The second wedding beer I brewed is a tweaked re-brew of a Robust Porter I brewed back in April 2014, hence the 2.0 designation. We decided to call it Plummer’s Porter as a homage to the place Rebecca and I met, Engineering Faculty at the University of Waterloo. Engineering students call themselves Plummer’s (intentionally misspelled). I believe it came out of embracing some name calling between Waterloo and University of Toronto several decades ago, something about us not being real engineers at the time, who knows.
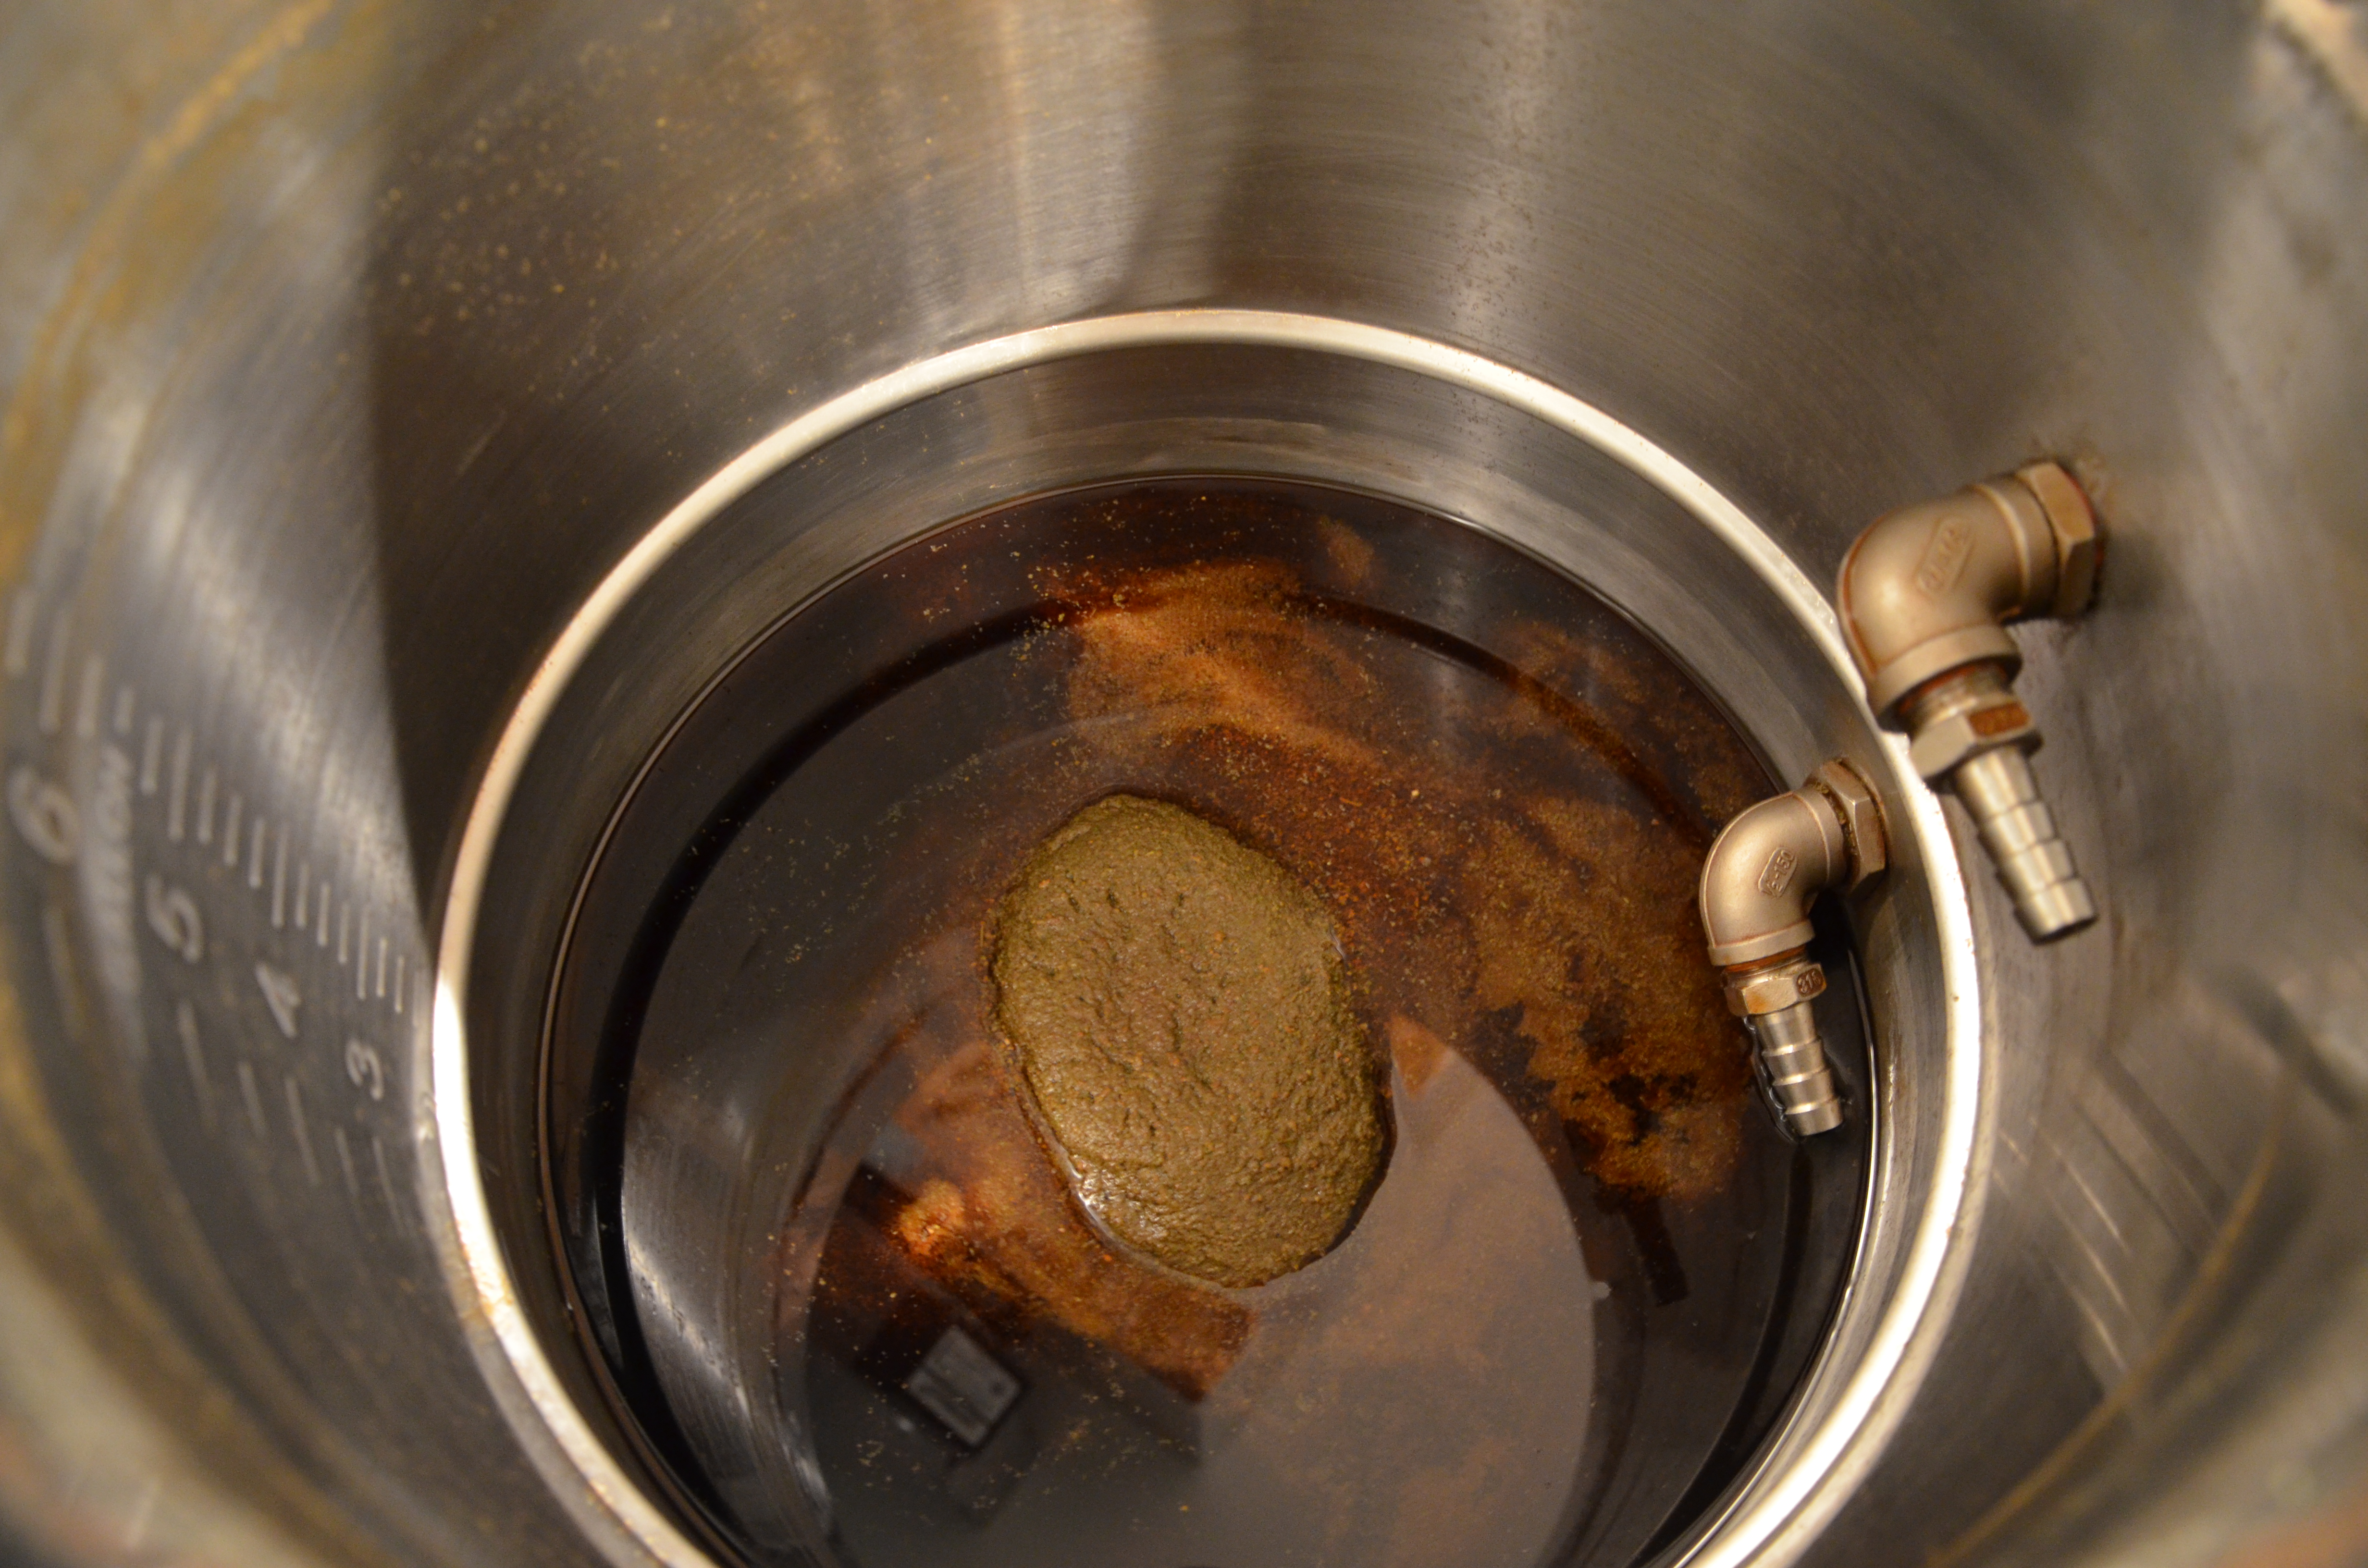
A perfect kettle trub cone after the whirlpool.
This post I am going to try to give a short insight to my recipe creation and tweaking process. This recipe is a tweaked version of the original recipe I brewed. When I am looking to brew a beer style that I never have before I start by going to the BJCP guidelines to get an understanding of the style and the main flavours and aromas associated with it. In this case, the key points of Robust Porter are all about the malt. There should be a noticeable roasty aroma accompanied by some supporting malt aromas. The flavour should feature lightly burnt black malt character with everything else supporting and balancing that. With that in mind I start to do some research by looking at some well established recipes. Usually that starts with Brewing Classic Styles (BCS) and then I also look at some well regarded clone recipes of classic examples of the style. For version 1.0 of this beer I ended up adapting Jamil’s Robust Porter recipe to my system volumes and efficiencies.
The last time I brewed this it came out with a bit too much milk chocolate flavour and too low in roast, so I approached this recipe with intent of tweaking it for more roast, and a dryer finish. With this in mind I bumped up the chocolate and black malts by 2 oz each. I mashed this beer at 154*F last time and it finished at 1.018, so I bumped it down this time to 152*F hoping to dry it out a bit more. I also happened to drink a bottle of Edmund Fitzgerald (by Cleveland’s Great Lakes Brewery) for the first time a few days before and loved it. Their website says they use Crystal 77L (probably Crisp) so I bumped my crystal from 45L to 65L to get a bit closer. It also just happens to be the #1 example of the style according to the BJCP. Increasing the lovibond of the crystal malt should give less caramel sweetness, and more nutty/toffee which suits a roast porter nicely.
Plummer’s Porter
Description
Brewed: Nov 5, 2014
OG: 1.062
FG: 1.014
Target ABV: ~6.3%
39 IBU
41 SRM
Process
Batch size: 6 gallons
Mash: 152°F for 60 mins @ 1.50 qt/lb thickness
Boil: 60 minutes
Pre-boil Volume: 7.25 gallons pre-boil
Brewhouse Efficiency: 75%
Grain Bill
9 lbs 2 Row 1.8L (G&P)
1.50 lbs Munich I 6L (Weyermann)
14 oz Crystal Malt II 65L (Fawcett)
12 oz Chocolate Malt 450L (Muntons)
10 oz Black Patent 550L (Muntons)
Boil Additions
1.75 oz East Kent Goldings 6.4% AA @ 60 mins (34.9 IBU)
0.50 oz Fuggles 4.9% AA @ 15 mins (3.8 IBU)
1 whirlfloc, 2 g DAP yeast nutrient @ 5 mins
1.00 oz East Kent Goldings 6.4% AA @ 0 mins
Water and pH
Mash pH target: 5.31 pH (Bru’n Water)
Water Volumes: mash 4.9 gallons, sparge 4 gallons
Gypsum: 0.5 g in mash, 0.4 g in sparge
Calcium Chloride: 1 g in mash, 0.8 g in sparge
Lactic Acid: 1.5 mL in mash, 1.6 mL in sparge
Water Profile: Ca = 55 ppm, Mg = 9 ppm, Na = 15 ppm, SO4 = 42 ppm, Cl = 52 ppm, HCO3 = 54 ppm, RA = 0 ppm, SO4:Cl = 0.8
Fermentation
WLP090 (~248 Billion cells)
Pitch at 62°F
Controller set to 65-66°F
Bump up to 70*F on Day 4
The brew day went fairly well. I started by heating 4.9 gallons of water to 163.5°F, slightly above Beersmith’s recommended strike temperature. Unfortunately this wasn’t high enough since my mash temp had settled in at 150°F when I measured it at 5 minutes in. I added 2 quarts of boiling water, which bumped it up to 151.5°F, good enough I guess. I always have a hard timing hitting my mash temp on the dot. I usually try and add a degree or two to the recommended temp but it usually isn’t enough. About 10 minutes into the mash I pulled a sample of wort and chilled it down for a pH reading. My target was 5.31 pH and my meter read 5.46 pH, which is a bit higher than expected. However I decided not to play with it since it was within the acceptable range, and it can be easy to overshoot if you start poking around too much. I probably could have added 0.5 mL of lactic acid and got fairly close to the 5.31 pH target.
After the mash rest was over, I began my batch sparge. I collected 4 gallons of 1.077 SG first runnings into my sparge bucket, then 3.7 gallons of 1.022 second runnings. It all mixed together in the kettle to hit 7.25 gallons of 1.052 SG pre boil. After the 60 minute boil I was left with 6.25 gallons (@boiling) of 1.062 OG wort, right on target. So I hooked up all my hoses and began the whirlpool.
You can see the hose/pump/chiller setup in the image below. Wort enters from the left hose, into the pump, through the counterflow chiller, then back into the kettle through the whirlpool arm I start with the water off running boiling wort through the pump/hoses/chiller to sanitize then turn on once I see the output of the chiller reach 180°F and hold it for about 20 seconds. Once I turn the chilling water on it only take a few minutes for the output of the chiller to drop to pitching temp (for ales). For lagers I just run as long as it takes to hit the same temp as the chilling water. In the winter the chilling water may be low enough temperature to go all the way into the 40’s, in the summer it can be as high as 60°F. Once I see the correct temperature on the output of the chiller, I disconnect the hose from the whirlpool arm and connect it to another hose that that goes into my fermenter.
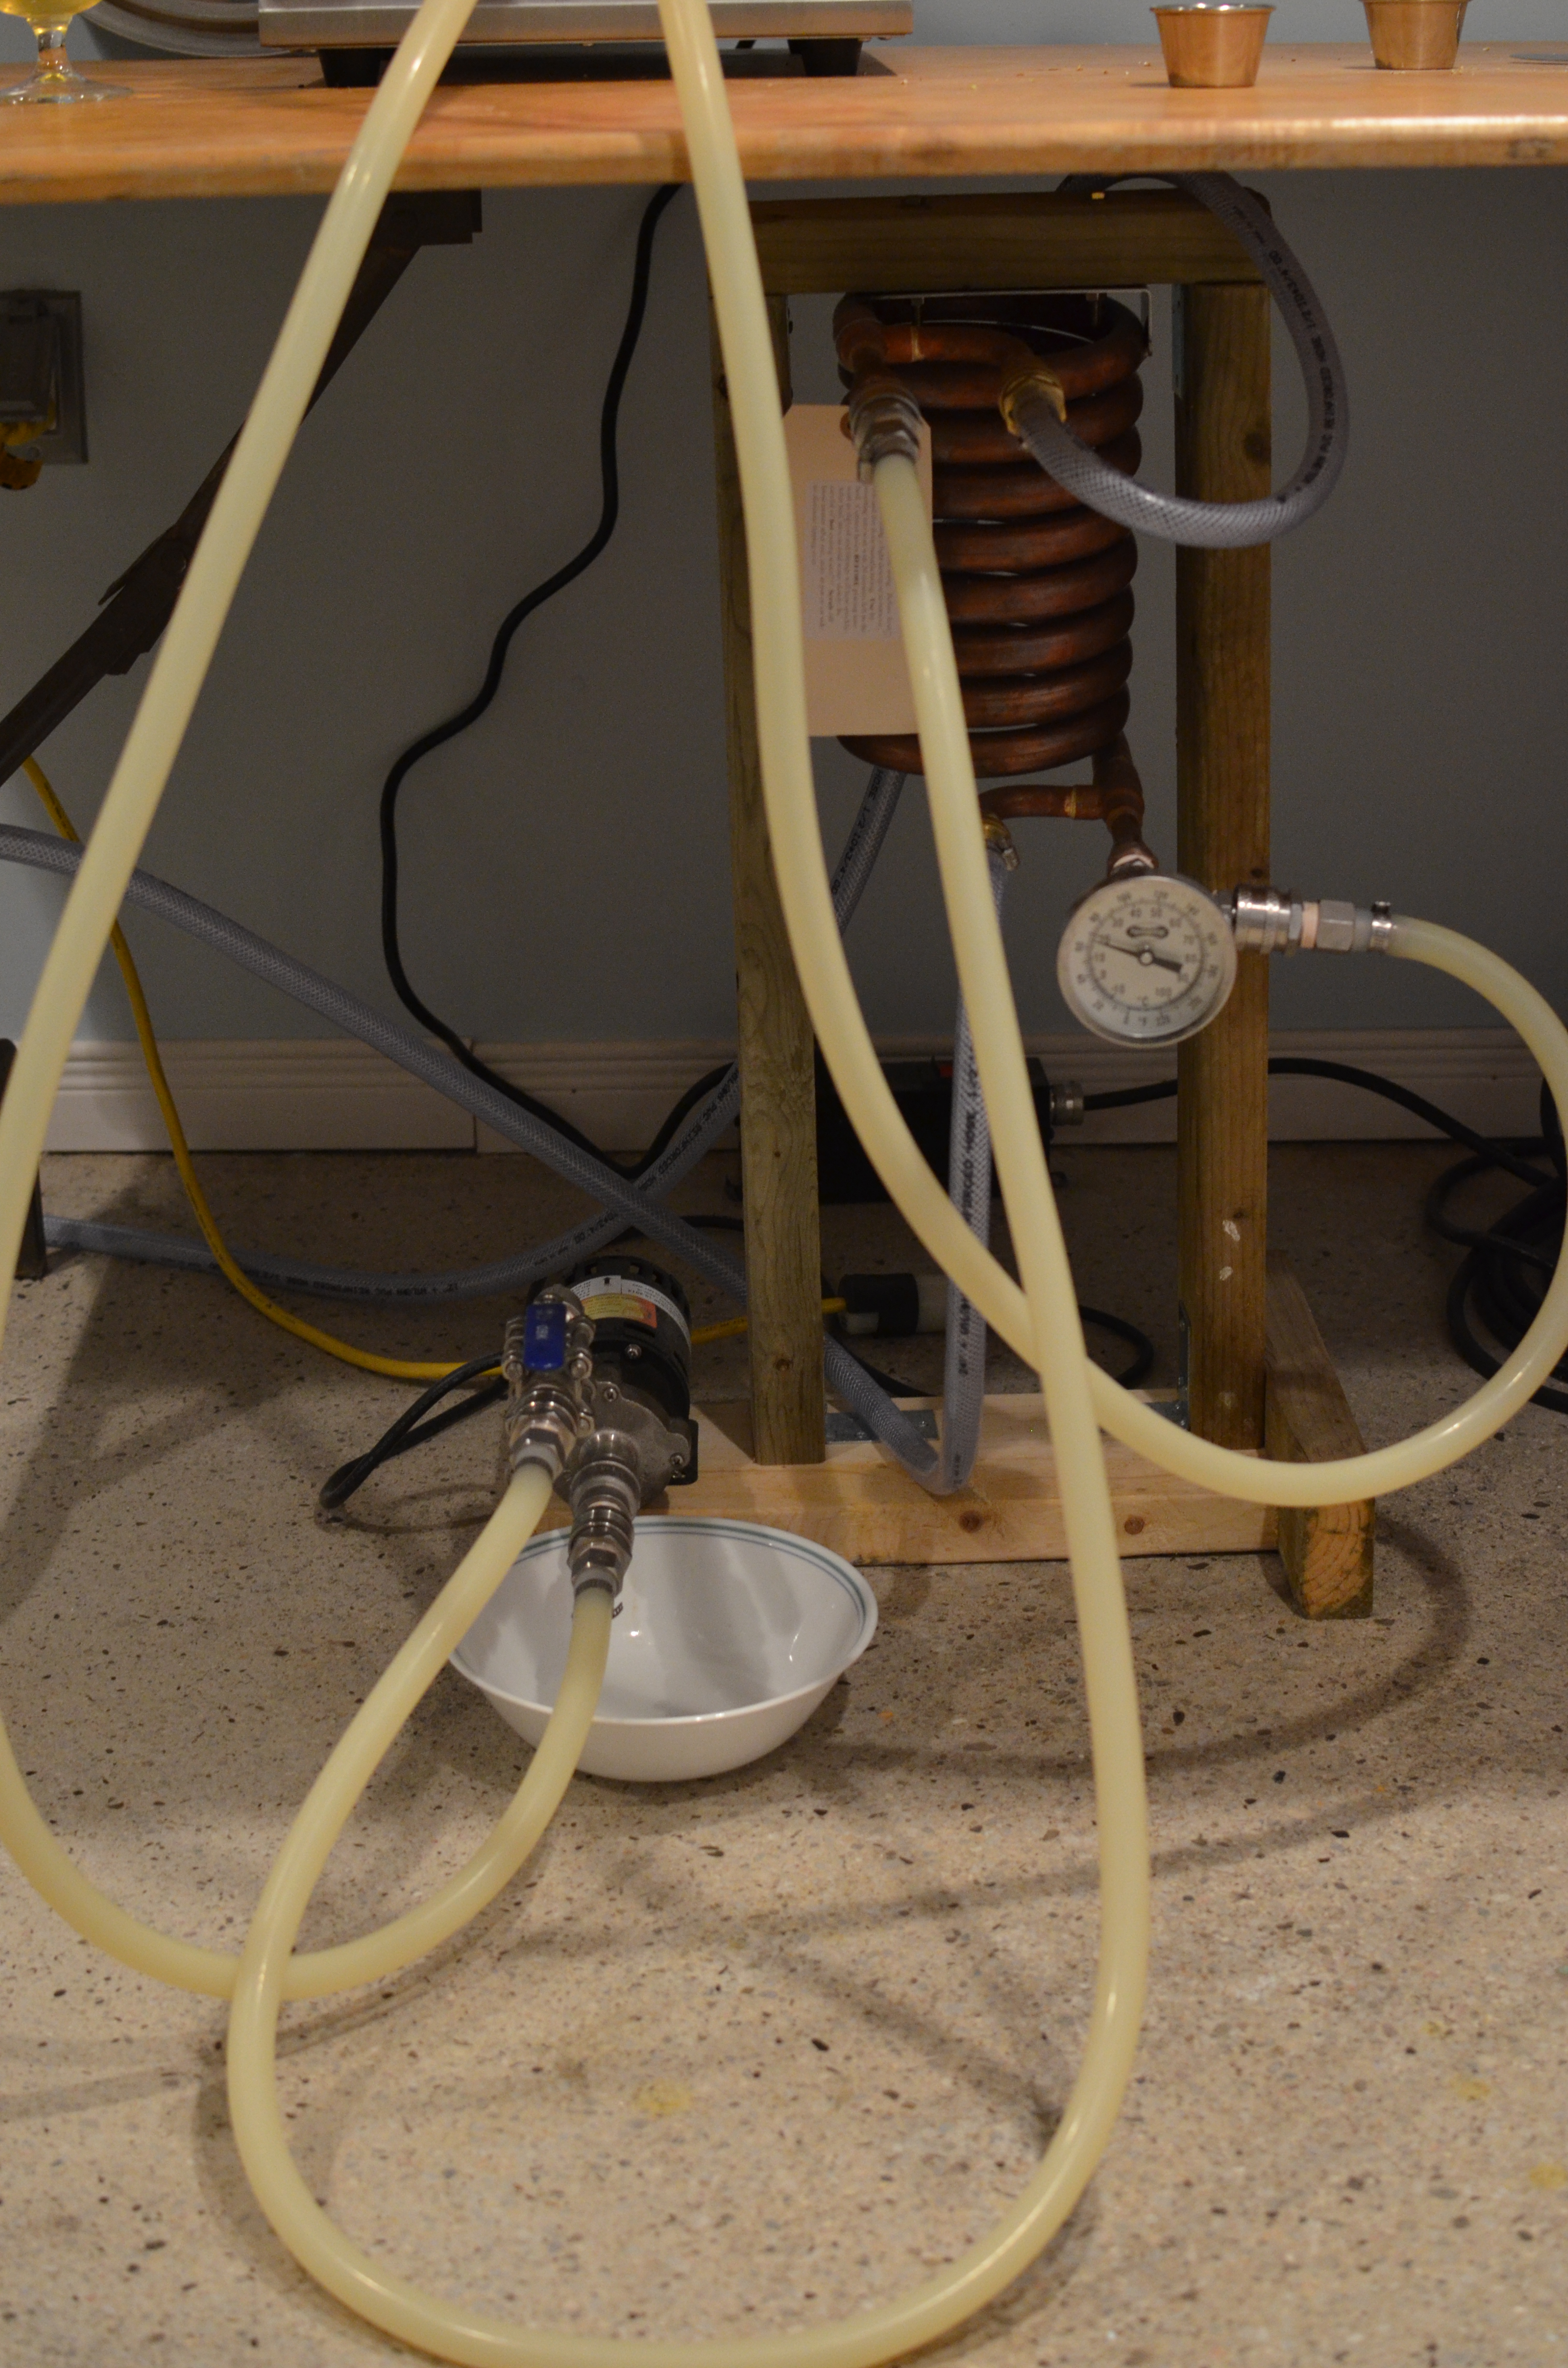
All the hoses hooked up for the whirlpool chill.
Once chilling and transferring was complete I was left with the trub cone you can see in the image above in this post. After pitching the yeast I oxygenated for 1.5 mins using my O2 wand. The temp controller was set to 55-56°F.
After 9 days I removed the carboy from the fridge and measured the FG to be 1.014, much more acceptable than Beersmith’s original estimate of 1.011 (that’s why I put 1.014 in the recipe up there). A quick taste of the hydrometer sample put a smile on my face. It has that nice level of roast and malt complexity, and a perfectly balanced of sweetness. I racked it into a purged keg to condition for a few weeks until a CO2 line opens up in my keezer.

Tasting the hydrometer sample. Look at that beautiful dark brown colour!

Regarding hitting your mash temps, I assume you heat the strike water and add it to your mash tun? Sounds like you are underestimating the thermal absorption of your mash tun, something beersmith can’t anticipate unless you add that parameter in I would think (I personally don’t use beersmith).
LikeLiked by 1 person
I think it’s more an issue with my mash in speed, especially since I use a scoop instead of dumping the bucket.
I overheat the strike water in my pot, then transfer it into my cooler. The lid goes on for 2 or 3 minutes to pre-heat the whole thing, then I take it off and stir or replace with cold water until I am just about low enough to my target strike temp. Then in goes the acid and salts. Then I stir a bit more down to the target temp then mash in. For me it’s a delicate balancing act of how many *F to strike over Beersmith’s recommended temp. Usually 1-3*F is a good number, I might have just taken a bit longer to mash this batch in than usual. This is why I dream of a RIMS tube! Mash temp would be one less thing to worry about.
Thanks for reading!
LikeLike
I want a pint right now! Little trick: to get the degree symbol on a Mac, hold Alt and press “K”; on a PC, hold Alt then press (in order) 0176. I wish my groundwater only got to 60° in the summer!
LikeLiked by 1 person
Thanks for the tip! I’m going to use that a lot!
Our weather in Toronto isn’t too bad. We don’t get the crazy cold that northern Canada gets but we don’t get the crazy heat of California or Florida. We also don’t get the snow of Buffalo, NY lol.
I’ve already forgotten how low my water got last winter but I’m pretty sure it was in the high 30’s. I was still able to chill down to 62*F in July so my water was a bit lower than that.
LikeLiked by 1 person